How to Measure Your Room for New Flooring
Measuring your room for new flooring is a crucial first step before you make any purchases. Getting accurate measurements ensures that you buy the right amount of flooring material, saving you from overspending or making multiple trips to the store. This guide will walk you through the process, making it easy to get it right the first time.
Having the proper tools and knowing how to use them can make the measuring task simple and straightforward. Many people overlook this step or rush through it, only to find out later that they didn’t buy enough materials or bought too much. By taking your time and following some basic steps, you can avoid these common pitfalls.
You’ll also learn about the different types of rooms and spaces you might have to measure, from standard rectangular rooms to more irregularly shaped spaces. Each type has its own set of challenges, but with some helpful tips and tricks, you’ll be able to handle them without stress. Accurate measurements are key to a successful flooring project. So, let’s dive in and get started.
Essential Tools for Measuring Your Room
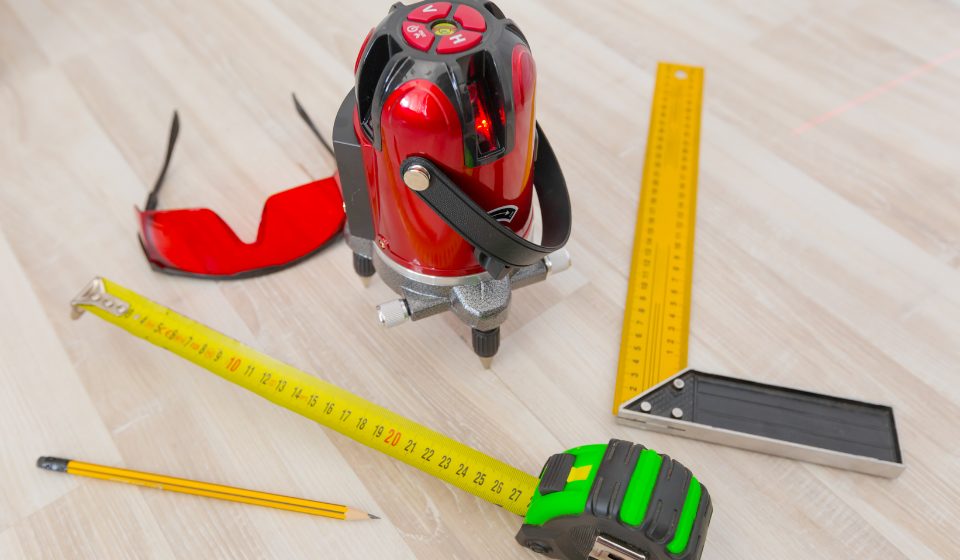
Before you start measuring your room for new flooring, you’ll need to gather some essential tools. Here’s a list of what you’ll need:
- Measuring Tape: A retractable measuring tape, ideally 25 feet long, is crucial for capturing accurate dimensions.
- Notepad and Pencil: You’ll need these to jot down measurements as you go.
- Calculator: Useful for adding up measurements and converting units.
- Laser Measure: While optional, a laser measure can provide fast and highly accurate measurements.
- Straightedge or Ruler: Helpful for marking out small sections or irregular spaces.
Having the right tools is important because each one plays a unique role in the measuring process. The measuring tape is your primary tool for capturing the length and width of the room. A notepad and pencil are indispensable for keeping track of numbers and making notes about areas you might need to recheck. A calculator ensures your math is correct, reducing the risk of errors. If you have access to a laser measure, it can make the job quicker and even more accurate. Lastly, a straightedge helps you measure smaller or tricky areas precisely.

Step-by-Step Guide to Measuring Your Room
Clear the Area:
Start by clearing out the room you plan to measure. Remove furniture, rugs, and any other items that might get in the way. This allows you to get the most accurate measurements without obstacles blocking your path. It also makes it easier to measure odd corners and small spaces.
Measure Length and Width:
Next, measure the length and width of the room. Place one end of the measuring tape against one wall and extend it to the opposite wall. Write down the measurements in feet and inches. Do the same for the other dimension of the room. It’s a good idea to measure at least twice to ensure accuracy. Double-checking can save you from costly mistakes later.
Measuring Irregular Spaces:
Not all rooms are perfect rectangles. For irregular spaces, break the room into smaller rectangular sections. Measure each section separately and note down the dimensions. Add up the measurements to get the total area. If the room has alcoves or closets, measure them separately and include those numbers in your total. Using a laser measure for awkward nooks can make this step much simpler and more precise.
By following these steps, you’ll have a solid foundation for planning your new flooring project.
Calculating the Total Floor Area
Converting Measurements to Square Footage:
Once you’ve measured the length and width of all the sections of your room, it’s time to convert these measurements to square footage. To do this, you simply multiply the length by the width for each section (Length x Width = Square Feet). If you measure in inches, you’ll need to convert to feet first by dividing by 12. Add up the square footage of all sections to get the total area you need to cover with flooring.
Adding Extra for Waste and Mistakes:
It’s a good idea to add a bit extra to your total square footage to account for waste and mistakes. During installation, you might have to cut pieces to fit perfectly, and this can generate scraps that can’t be used. A safe rule of thumb is to add 10% to your total square footage. So, if your room measures 200 square feet, you should plan to buy about 220 square feet of flooring. This ensures you have enough material for cut-offs and any potential errors.
Adjustments for Different Flooring Types:
Different types of flooring have different requirements. For example, if you’re installing hardwood or laminate, you might need underlayment, which should also be accounted for in your measurements. Carpeting might require padding. Some types of flooring might expand and contract due to temperature and humidity changes, so you need to allow for those adjustments as well. Always check the manufacturer’s guidelines for any specific calculating needs related to the type of flooring you plan to install.

Common Measuring Mistakes to Avoid
Overlooking Doorways and Closets:
A common mistake when measuring a room is to overlook the doorways and closets. These areas are part of the room, and they need flooring too. Make sure to measure these spaces separately and include them in your total calculations. Ignoring these small but important areas can leave you short on materials.
Not Accounting for Irregular Shapes:
Another mistake is failing to account for irregular shapes in your room. Rooms often have alcoves, nooks, or other architectural features that can disrupt a straightforward measurement. Break your room into smaller rectangles to measure these irregular areas accurately. Add all the smaller measurements together to get your total floor area. This method ensures you don’t miss out on any tricky spots.
Misreading Measurement Tools:
Misreading your measurement tools can lead to significant errors. Double-check your measurements to ensure you’ve recorded them correctly. Look at the units your tape measure uses and make sure you note whether it’s in inches or feet. If you’re using a laser measure, read the instructions carefully to understand how it calculates distances. Taking your time to get accurate readings can prevent costly mistakes when ordering your flooring materials.
Measuring your room accurately for new flooring is an essential step to ensure a smooth installation process. From gathering the right tools to following a step-by-step measurement guide, paying attention to details can save you both time and money. Whether you’re working with hardwood, carpet, or another type of flooring, precise measurements and calculations make all the difference.
At Caruso’s Floors, we’re here to help you understand every part of the flooring process, from measurement to installation. With our wide range of options in styles and colors, you can find the perfect fit for your commercial or residential project. Visit our flooring store today to get started on transforming your space. Let us help you make your flooring project a success.

